Creating a Slide Show Using KID PIX
Before you begin making your Slide Show you will need to create
several KID PIX pictures and save them in a folder. This folder needs
to be kept in the KID PIX folder.
1. Open the KID PIX folder but DO NOT open the program.
2. Find the icon for the Slide Show. Double click on it.
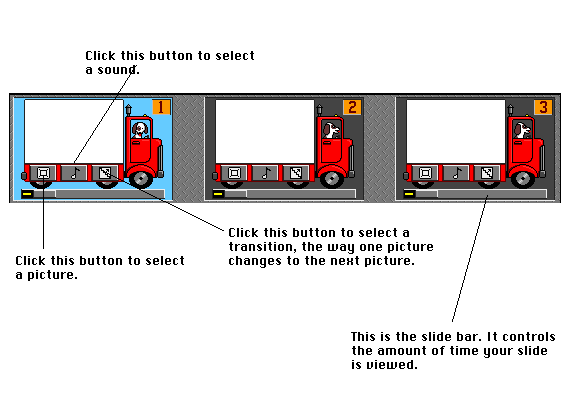
3. You will see a screen full of trucks. This is your storyboard or
Slide Show layout.
On each truck there are 3 buttons. The truck sits on a slide bar
that controls the amount of time your slide is viewed.
The first button on the left is the button you use to select a
picture.
The musical note button is the button you use to select a sound
or record a sound of your own.
The last button on the right is the button you use to select a
transition, the way one picture changes into the next picture. 
4. Fill the trucks with all of your pictures. There are 99 trucks
possible! You can rearrange the pictures even after they are in the
trucks, by clicking and dragging on the picture and moving it to
another truck. You will *love* the sound effects!
5. Click the play button at the bottom of your screen.
Enjoy!
6. To save your Slide Show, go to File. Go to Save As. Give your
Slide Show a title. Make sure that normal is selected under the Save
Title window. Click on Save.
Joanne Goodwin,
Technology Resource Teacher
Back to The Technology Resource Page
