Creating a Class List Using a Spreadsheet
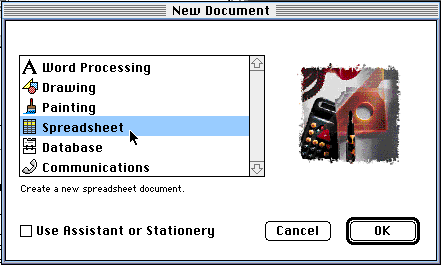
- Open ClarisWorks. At the startup screen,
choose Spreadsheet. Press return, or click OK.

- You will then see a page full of lines,
letters, and numbers. Then menu bar choices look a little
different, too.

- Click on View in the menu bar and drag to Page
View. (This will keep your document the size of the page on which
you'll be printing it.)
- Next, click in the cell (that's what the boxes
are called in spreadsheets) located at A1. It should become
highlighted.
- Click on Format in the menu bar and drag to
Column Width. A box pops up with a space for you to type in a
column width. Type in 150 and press return. The column
automatically extends to a width large enough to accommate even a
long name.

- Cell number A1 should still be highlighted.
Type the word Name. Press return and your typing appears in the
cell. You'll notice the next cell down is now highlighted.
- Now enter the names of all the students in
your class. After typing each name, press return.
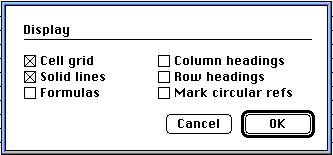
- Click on Options in the menu bar and drag to
Display. Choose Cell grid and Solid Lines, and make sure the other
boxes are empty. Click OK.

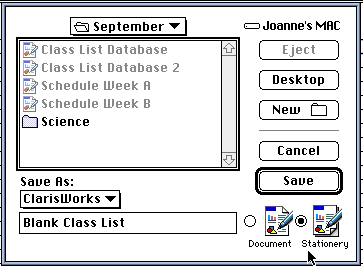
- Before going any further, choose Save and name
the spreadsheet Blank Class list. Be sure to click the Stationary
icon in the bottom-right corner of the window. Follow the
instructions as they appear on the screen.

- Now you can adapt this spreadsheet for a
specific use. Go to the Format menu and choose Insert Header. A
header appears at the top of your spreadsheet and cannot be
altered by any information you put in the spreadsheet
itself.
- Name your checklist. You can choose to change
the font, size and style.
- Now click back on the actual spreadsheet in
the cell just to the right of the word Name.
- You can work across this row to put in dates,
or subjects, etc. You are now ready to print.
Joanne Goodwin,
Technology Resource Teacher
Back to The Technology Resource Page


