Adding Text
These directions were written for use with HyperStudio
3.1.
- To add text, click on Objects in the menu bar
and drag down to Add a Text Object. You will now see a box made
out of "dotted lines" on your card. HyperStudio refers to these as
"marching ants".
- If you click in the center of this box and
drag the box, you can move it to a new location.
- If you want to resize the box, move the
cursor to the outside edge of the box and when it changes to
arrows, you can click and drag to resize it.
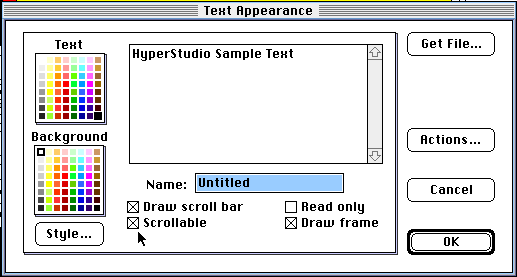
- When you click outside the box you will get
this screen:

- Since we are making a box for our title, click
inside the two boxes Draw scroll bar and Scrollable to get rid of
those options.
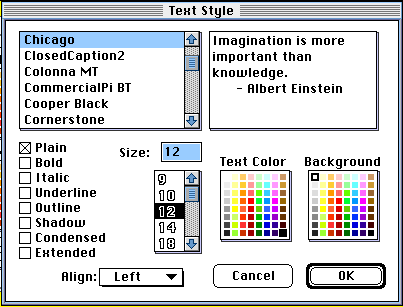
- Click on Style and you will get another screen
full of choices and styles.

- After making all of your choices of size,
font, styles, colors and alignment, click OK at this screen and
the next and you will be back to your card and ready to type in
the title for your project.
- Make sure the browse tool
 is selected to type in your text.
- If you want to edit the size or font or color,
select the "text object editing tool"
 and double click on the text box on your
card.
 .
.
Add a Border and
Background| Add Text| Add a Button


 .
.